erick@spiewakgroup.com
0750-3668626
+86-13428282793


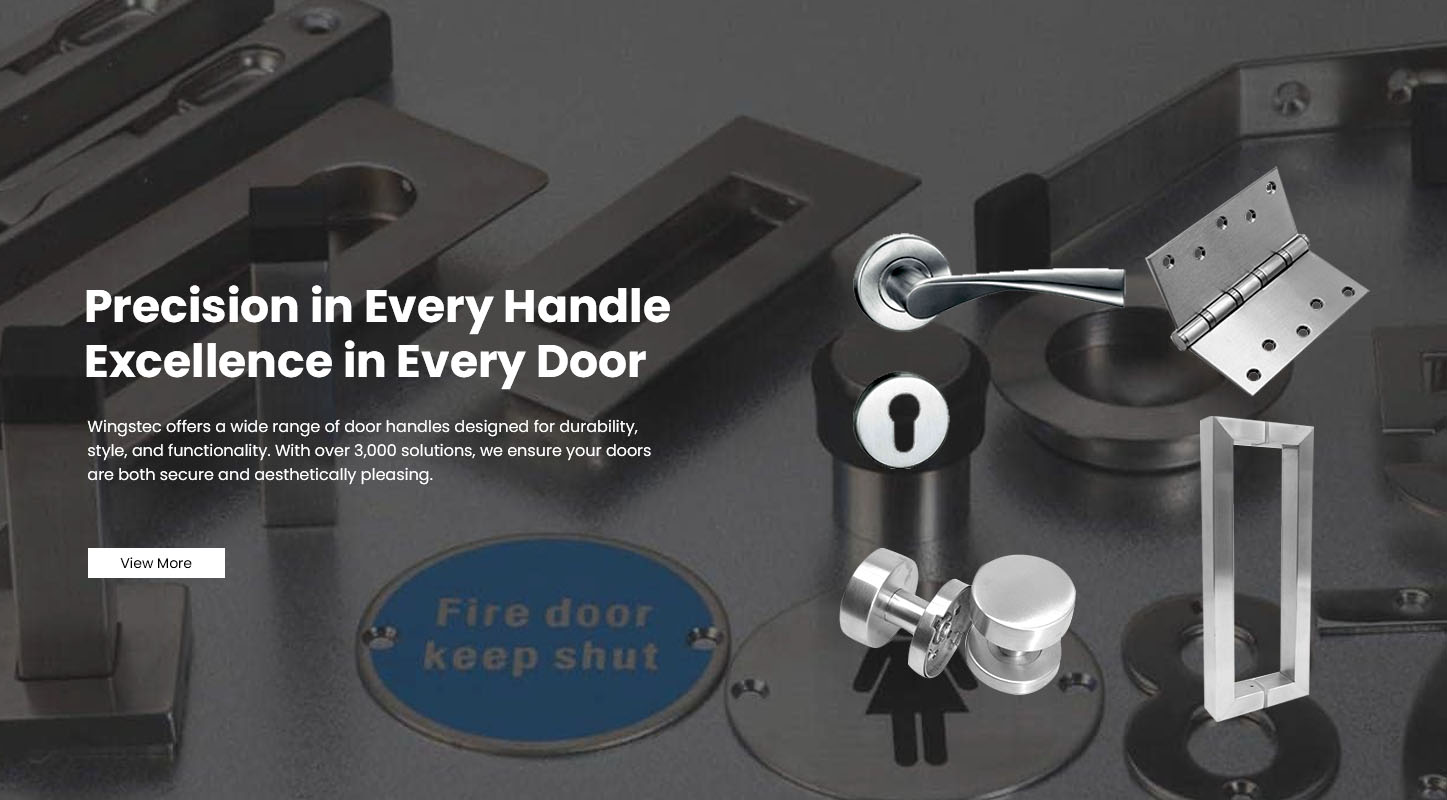
Lever Door Handles with hex set screws are among the most common types used in both residential and commercial buildings. The small hex screw — often hidden underneath or on the side of the handle — secures the lever to the spindle shaft, keeping it stable and aligned.
When you need to remove or replace your handle, knowing how to properly loosen and detach this screw is essential. Done correctly, the process is quick, safe, and damage-free.
At WINGSTEC, we design precision-engineered lever handles with durable hex-fix systems that make installation and removal smooth, secure, and efficient. Follow the guide below to learn How To Remove A Lever Door Handle with hex screws like a professional.
A hex set screw (also called a grub screw) is a small, headless fastener tightened with an Allen wrench (hex key).
It locks the handle to the spindle, which connects both sides of the lever.
Hidden under the handle neck or on the side base.
Secured using a 2mm–3mm hex key.
Found in both residential and commercial-grade levers.
Designed for strong grip and anti-loosening performance.
WINGSTEC’s hex-secured handles use hardened stainless steel screws and precision-threaded spindles, ensuring a tight, wobble-free connection even after thousands of uses.
Prepare the following tools before removing your lever handle:
| Tool | Purpose |
|---|---|
| Allen wrench (hex key) | To loosen the set screw |
| Small flathead screwdriver | To lift trim plates or assist removal |
| Phillips screwdriver | To remove mounting screws if necessary |
| Soft cloth or tape | To protect door surfaces |
| Plastic pry tool | To remove decorative covers safely |
Tip: Use the correct size hex key — typically 2mm, 2.5mm, or 3mm. Using the wrong size may strip the screw head.
Check underneath or on the side of the lever neck.
You’ll see a small round hole that houses the hex set screw.
Shine a flashlight if needed to locate it.
Insert the correct-sized Allen key fully into the hole.
If the screw is tight, turn gently — never force it. High-quality models like WINGSTEC handles use precision-threaded hex screws that can be loosened easily with minimal effort.
Turn the Allen wrench counterclockwise (left) to loosen.
Usually, one to two full turns are enough — you don’t need to remove the screw completely.
The handle should start to loosen from the spindle.
If the screw is stuck due to rust or over-tightening, apply a small drop of lubricant and wait a few minutes before retrying.
Once the screw is loosened:
Hold the handle firmly and pull it straight outward from the door.
Avoid twisting; twisting can damage the spindle or latch alignment.
The lever should slide off smoothly, exposing the spindle shaft underneath.
WINGSTEC lever handles feature anti-scratch bushings around the neck to protect the finish during removal.
Some lever sets include a decorative rosette or cover plate that hides the mounting screws.
Use a plastic trim tool or flat screwdriver wrapped in tape.
Gently pry the edge of the plate.
Once lifted, remove the underlying screws with a Phillips screwdriver.
This step gives access to the mounting assembly for deeper maintenance or replacement.
After removing the lever:
Check the spindle for wear or rounding.
Inspect the hex screw for stripped threads.
Wipe the handle and spindle clean with a soft cloth.
Apply a small amount of silicone-based lubricant to prevent future sticking.
If any part shows excessive wear, it’s best to replace it with a genuine WINGSTEC spare component to maintain mechanical accuracy and smooth performance.
If reinstalling the same lever:
Slide the handle back onto the spindle.
Tighten the hex screw clockwise until snug — don’t overtighten.
Test the handle to ensure it operates smoothly and stays secure.
WINGSTEC’s handles feature precision-fit spindles and anti-loosening screws, making reinstallation quick and reliable.
| Problem | Possible Cause | Solution |
|---|---|---|
| Hex screw won’t loosen | Stripped or rusted threads | Apply lubricant or replace the screw |
| Lever won’t slide off | Screw not loosened enough | Turn 1–2 more rotations |
| Handle spins freely | Damaged spindle | Replace spindle or full handle assembly |
| Screw hole blocked by paint/dirt | Dirt buildup | Clean gently with toothpick or compressed air |
If problems persist, avoid forcing parts — doing so could damage the spindle or handle body.
Tighten periodically: Check the hex screw every 6–12 months to prevent loosening.
Avoid overtightening: It may strip threads or crack the handle collar.
Keep dry: Prevent moisture buildup that can corrode screws.
Use correct tools: Always match the hex key size to the screw.
Lubricate lightly: Maintain smooth motion without residue buildup.
All WINGSTEC lever handles are endurance-tested for 200,000 operational cycles and 96-hour corrosion resistance, ensuring stability even in high-traffic environments.
WINGSTEC Hardware combines engineering precision with user-friendly design, ensuring that even maintenance tasks like removing a hex-secured handle are simple and efficient.
Durable Hex Set System: Stainless steel screws prevent rust or stripping.
Precision Spindle Engineering: Zero wobble or misalignment.
Universal Compatibility: Suitable for both residential and commercial doors.
Easy Maintenance: Quick disassembly for cleaning or repair.
Premium Finishes: Available in chrome, brushed nickel, matte black, and gold.
These qualities make WINGSTEC lever handles ideal for hotels, offices, and modern residential projects where both design and reliability matter.
Removing a lever door handle with a hex screw is simple when you know where to look and how to handle it properly.
By loosening the hidden screw with the correct Allen key, pulling off the lever carefully, and cleaning the components, you can perform maintenance or replacement in just a few minutes.
With WINGSTEC’s advanced hex-fix technology, strong materials, and ergonomic design, you can count on smooth operation, easy servicing, and long-lasting performance — no matter how many times you install or remove it.